
Payments made via the public Sport website (ResultsVault WebStore and Member Signup options) are listed here, as well as Payments that are manually added.
This screen allows maintenance of these payments made by a Person.
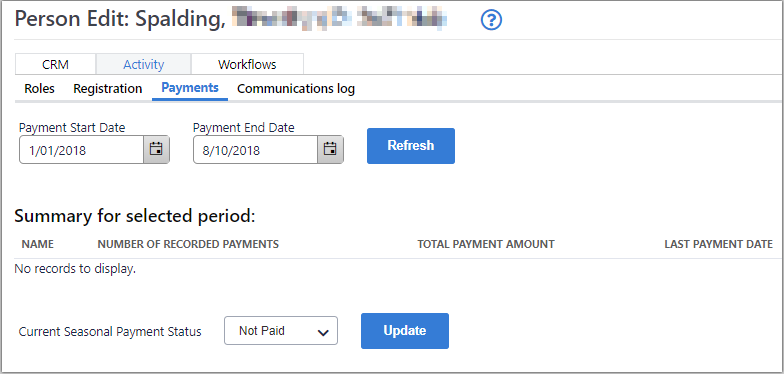
On the Person Edit screen, Payments tab, payments are displayed for a date range that defaults to the current season.
To change the date range:
- Enter the Payment Start and End date
- Click Refresh.
- The payment summary, and the payments list will refresh to show details for the selected period.
On the Person Edit screen, Payment tab.
- Click the Add Payment link to add a payment.
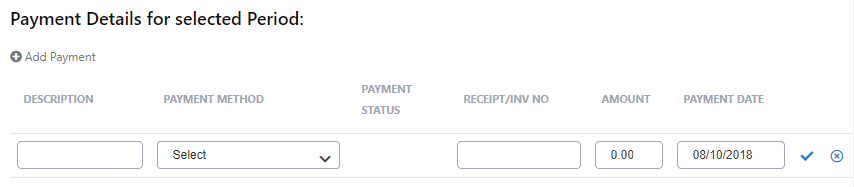
- Enter the payment details as per the table below.
Click Update to add the payment, or Cancel to cancel the new payment.
Refunds can be made by entering a negative amount, and selecting 'Other' as the payment method.
| Description | Enter a description of the payment - e.g. 'Yearly subscriptions' |
|---|---|
| Payment Method | Select a payment method from the payment method dropdown list. |
| Payment Status | This will be blank and will update automatically to Paid once the payment has been added. |
| Receipt/Inv No | Enter the receipt/invoice number - if this is not relevant to this payment, just enter any text (e.g. a dash -) |
| Amount | Enter the payment amount. |
| Payment Date | Enter the payment date in (dd/mm/yyyy) format. |