
This page primarily allows the import of new person records, but can also be used to bulk update certain information for existing records. A file (in a particular format) can be uploaded and can contain a mixture of new (that have no ID supplied) and existing (that have an ID supplied) person records.
New records are added to the person list, whereas existing records are modified. A number of data validation rules must be satisfied before data is changed.
Generate Import Template
This section allows you to generate an import template file in the correct format - that may optionally include current data to update.
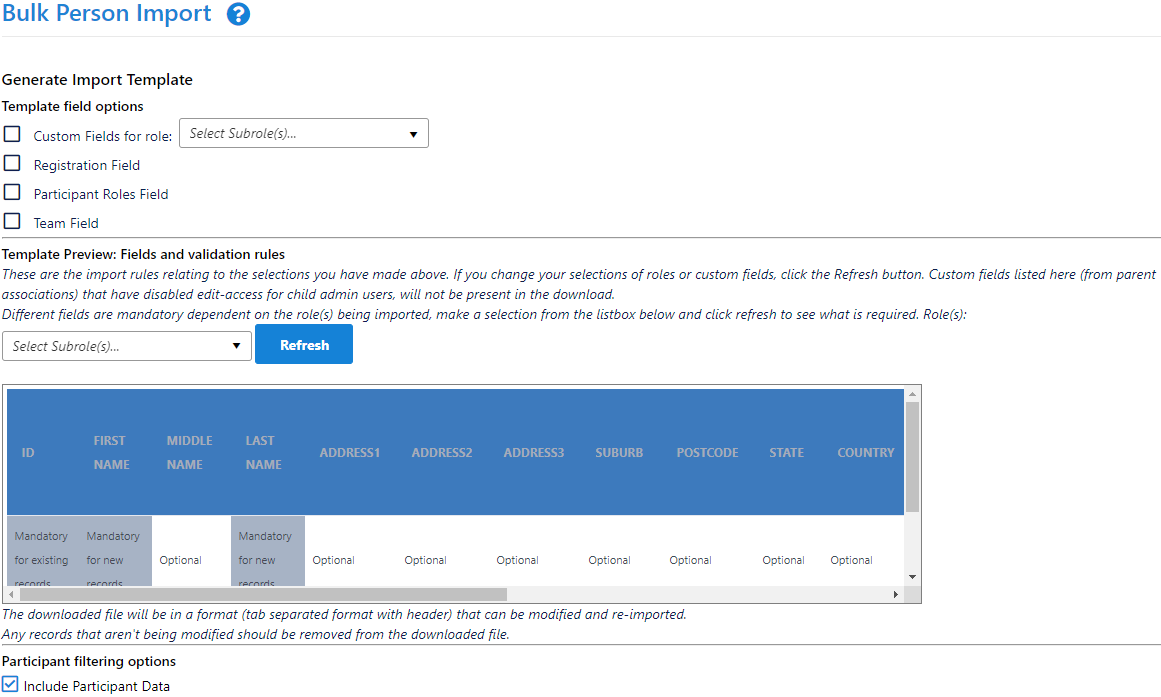
| Template field options |
|
|---|---|
| Template preview: Fields and validation rules |
|
| Participant filtering options |
|
Click the Download import file template link, and save the file to your hard disc. The file will be in tab delimited format with a header row.
You will need to review the file and fix the information in case of updating in bulk. In case of importing new records, you will need to enter the information in the correct formats and validations rules.
- Open the file - recommend in Microsoft Excel. Each data field should be in a separate column. If using a text format such as CSV/TSV, and opening in Excel, care should be taken that Excel does not convert text columns that look like numbers (e.g. mobile phone numbers) to numbers that may result in loss of information. Consult the Excel help on how to import text documents and override the data types of certain fields.
- Remove records (rows) in the file that you do not wish to change by deleting the entire row. If you are importing only new records, then delete all rows except for the headings.
If importing/updating custom fields, then you can remove custom fields you don't want to import/update.
For example, if the template you downloaded includes 4 custom fields, and you only want one, then delete the other 3 custom field headings, and data relating to these, for all rows of information. If importing custom fields, the Import Custom Fields checkbox must be checked, otherwise any custom fields present in the import file will be ignored.Do not remove any Standard Field information or headings from the import file.Change the appropriate information for existing records (if any). First and last names cannot be changed by this process, and changes to these fields will be ignored.
You may be able to copy and paste from existing data files you may have.
- Add the appropriate information for new records (if any). For new records, first and last names must be specified and the ID field must be blank.
- Save the file in Excel (or text) format.
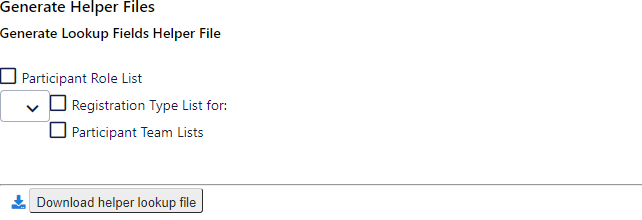
Generate Helper Files
This is optional. You only need to download helper files if you want to import certain custom information, for example, roles, registration type and participant team lists. The helper file will provide you with a list of correct roles, names, team names and registration types to fill in the import file for both existing and new records.
Upload the import file
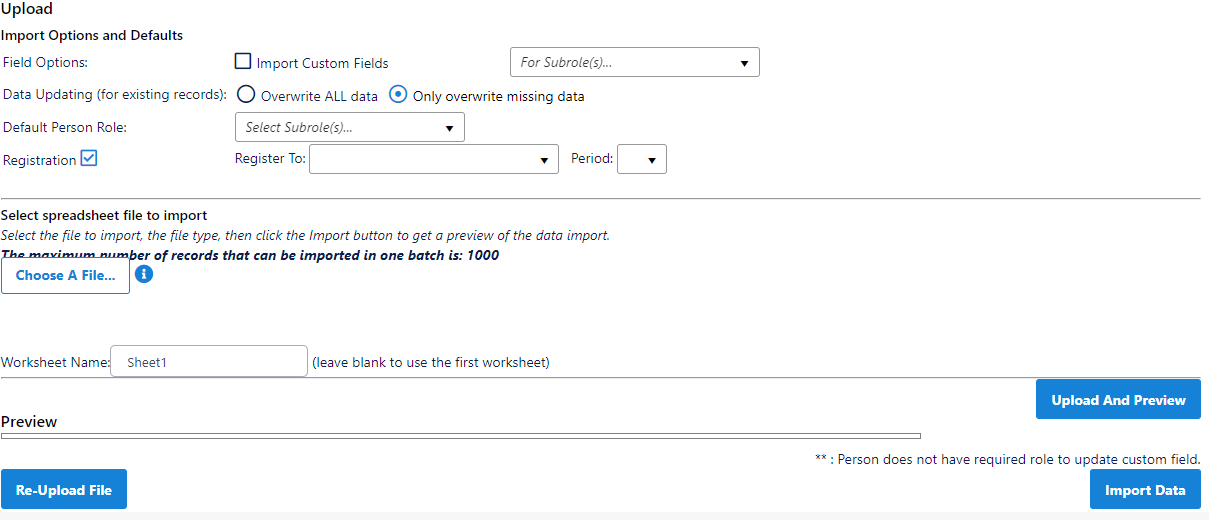
Data Updating (for existing records)
These options determine the behavior when updating existing records from the import file. It is not relevant for importing new records.
Overwrite ALL data
Use with care! Any blanks in the import file will be written, which could lead to loss of data.
Example:Home phone
Work phone
Mobile phone
Value for Player X in database
9399 9999
9488 8888
0411 111111
Value for Player X in import file
9877 7777
(blank)
0411 111111
Value for Player X in database after file is imported
9877 7777
(blank)
0411 111111
Only overwrite missing data - only fields that have been provided in the import file AND are missing from existing data will be written. This option means that you can leave fields blank in the import file without overwriting existing data.
Example:Home phone
Work phone
Mobile phone
Value for Player X in database
9399 9999
9488 8888
0411 111111
Value for Player X in import file
9877 7777
(blank)
0411 111111
Value for Player X in database after file is imported
9877 7777
9488 8888
0411 111111
Default Person Role
A Role and at least one sub role must be selected. This only affects new person records.
These roles are added to any new records. Existing records do not have their roles modified.
The Bulk Change Roles screen can be used to change roles of existing records
- If the Import Custom Fields option is checked, then custom fields that apply to these roles can be imported.
Registration
Tick the Registration box if you want to register people as part of the import process.
Un-tick the Registration box if you do not want to register people as part of import process.
Importing the data
Once all options have been selected, including the file to import, click the Upload and Preview button. The system will validate your choices, and if import is possible, a preview screen will display. This screen lists data for the records present in your import file, and gives an indication of what the values of each field will be after the import.
| LIGHT GREEN | A new record which will be added to your person list. |
|---|---|
| LIGHT PURPLE | An existing record which will be modified in your person list. |
WHITE | An existing record which has no changes, and will not be modified. |
| RED | A record which has an error, and will not be imported/modified. This may be due to the creation of a duplicate record, failure of various validation checks, or the fact that the organisation may not have the access to edit an existing record. |
At the Preview screen, you can click the Re-upload file to make changes to the import file and reload into the Preview screen.
Once you have reviewed the data in the Preview screen, click the Import Data button to save your changes to the database. Any records that have been marked as in error (in red) will be skipped. Once imported, changes cannot be undone, although data can be re-imported, and/or individual records can be edited in the usual way. A final confirmation screen displays after import that indicates the import status of each row with colour-coding, the same as in the Preview screen.
Other important notice
Import file formats
Files can be imported in any of the following formats:
- Microsoft Excel (97 onwards) Excel (97 onwards) file:
- The data can be in any Worksheet within the imported workbook, however the name of the Worksheet containing the data must be specified exactly in the Worksheet Name text box (this is case-sensitive). Alternatively, leave this field blank to automatically use the first worksheet in the workbook.
- The Worksheet must contain data for standard fields in columns 1 to 19 as per the Field order specified below. If custom fields are being imported, these are supplied in columns 20+ onward. However, most data is optional, and does not need to be supplied in each column.
- Header row - a row containing the field names. Field names in the header row for standard fields are ignored. If custom fields are being imported, the field name as obtained from the downloaded template must not be changed.
- If data is not available for a particular field for a record, leave the appropriate cell empty.
- Use one row per record - ID numbers must not be repeated. Use as many rows as required and leave all subsequent rows blank.
Note: If removing rows of data from Excel, make sure that the row is deleted rather than just clearing the cell contents. Even though the rows may look empty, Excel sometimes considers there to be data in to cells that can affect the import. If the import is giving problems and the data looks correct, try saving the Excel file as a CSV or TSV file, and trying to import in that format.
- Comma separated values (CSV) separated values (CSV) file:
- Note: CSV format cannot be used if importing Custom fields.
- This is a file with each row on a new line, and values within each row separated by commas.
- Header row - a row containing the field names. Field names in the header row for standard fields are ignored.
- If data is not available for a particular field for a player, a comma 'placeholder' must be used. For example - the following is a placeholder between A and B: A,,B,C......
- Use one row per record - ID numbers must not be repeated. IDs must not be repeated. Use as many rows as required. Each row must have a total of 16 commas, corresponding to 17 fields.
Note: If there are commas in the data (e.g.) in an address field, this format cannot be used. In this case convert to Excel or TSV format.
- Tab separated values (TSV) separated values (TSV) file:
- This is a file with each row on a new line, and values within each row separated by tabs.
- Header row - a row containing the field names. Field names in the header row for standard fields are ignored. If custom fields are being imported the field nameas obtained from the downloaded template must not be changed.
- If data is not available for a particular field for a player, a tab 'placeholder' must be used. For example - the following is a placeholder between A and B: A<tab><tab>B<tab>C...... where <tab> refers to a tab character.
- Use one row per record - ID numbers must not be repeated. IDs must not be repeated. Use as many rows as required. Each row must have a total of 16 tabs, corresponding to 17 fields.
Note: Data downloaded by clicking the Download import file template link will be in tab delimited format, with a header row.
Import Field order and validation rules:
Further information about whether a field is mandatory, and the allowable values can be found within the_Required file format and validation rules_ table which displays during the import process. The same validation rules apply irrespective of whether records are added/modified using the bulk import process, or manually editing records one by one using the person edit screen.
Field number | Abbreviation | Definition | Allowable values |
|---|---|---|---|
Standard fields | - | These fields MUST be supplied, in this order, and the header/field name (if provided in the import file) is ignored. |
|
1 | ID | The person's ID. This is a 7 digit number that can best be obtained by generating an import template (see below). | Integer- leading zeroes are ignored, or left blank. |
2 | First Name | The person's first name. For existing records any changes to this field are ignored. Must be supplied for new records. | Text |
3 | Middle Name | The person's middle name(s) (or initial). | Text |
4 | Last Name | The person's last name/surname. For existing records, any changes to this field are ignored. Must be supplied for new records. | Text |
5 | Address1 | Person's street or postal address. Use as many of these as required. | Text |
8 | Suburb | Suburb, or city/town related to address. | Text |
9 | Postcode | Postcode/zipcode related to address. | Text |
10 | State | State (or county) related to address. | Text |
11 | Country | Country related to address. | Text |
12 | Date of birth | Date of birth for person. Allowable formats: d/m/yyyy (eg 3 April 1963 is 3/4/1963), yyyy/m/d (eg 1963/4/3), formats such as Apr 3, 1963 also allowable. Hyphens (-) may be used instead of slashes (/). Please use the full year (1963 instead of 63) and avoid the US style m/d/yyyy format. | Date format as listed. |
13 | Home | Phone numbers for person. Mobile phone numbers should be specified as they would be called from your country - avoid international and other codes. | Text |
16 | Email address | Email address for person. Recommended. Must be a valid email address. Multiple addresses can be entered by separating with a semi colon (;) - | Text |
17 | Gender | Preferably enter M or F. Anything starting with M or F is accepted, anything else ignored. | Text |
18 | Next of Kin / Emergency Contact - Name |
| Text |
19 | Next of Kin / Emergency Contact - Number |
| Text |
Custom fields | These fields MUST follow all standard fields. Order is not important, but the header/field name as obtained from the downloaded template must not be changed. Custom fields that are not required to be uploaded/modified can safely be removed/omitted from the import file, and any data in such fields will not be changed within the system. |
| |
20+ | Custom Fields - as many as required. | Text | *Custom fields are only imported if the Import Custom Fields option is checked. |