It is often useful to define Custom Person Lists where the Persons displayed can be filtered based on certain criteria, with control over what information (i.e. the fields of data) are displayed. Any number of these 'Custom' lists can be created that can be available for all organisation users, or for a single user.
Custom Lists can be viewed via the sub-menu menu item under the Person menu item*, or by clicking the relevant View link from the Custom Person List Management screen.
*Only those available to all users can be viewed in this way.
Using the Custom Person List Management screen
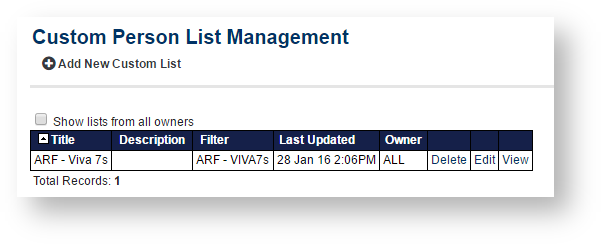
The Management screen is accessable from the main administration menu, and presents The Customer Person List Management screen displays a list of the current Custom Person Lists.
By default, lists are displayed that can be accessed by all users (designated with an Owner of ALL), and by the current user (designated with an Owner of the user name).
To maintain lists owned by other users, check the Show lists from all owners checkbox. This function is only available to users with PERSON MANAGER rights. These lists can be deleted, but not modified.
Add a new Custom Person List
...
- On the Customer Person List Management screen, click the Add New Custom List Link
...
- to display the Custom Person List Maintenance screen
...
- .
...
- Add the new custom list according to the table below for Edit a Custom Person List
...
- .
- Click the Save List button to save changes.
Edit a Custom Person List
...

Click the Edit link of the list to be edited.
TheThe Custom Person List Maintenance
screenscreen opens.
Follow the steps below: Using the Custom Person List Maintenance screen- Edit the fields according to the table below.
Click the Save List button to save changes.
Note Lists owned by other users cannot be edited.
Delete a Custom Person List
- Click the Delete Link of the filter to be deleted.
- Click OK at the confirmation popup.
View a Custom Person List
- Click the View Link of the filter to be viewed. The actual list will be displayed.
Using the Custom Person List Maintenance screen
...
| Title | This will be the name used to identify the List from the administration menu. |
|---|
...
| Description | Enter a description for the list. This is only displayed on |
|---|
...
| the Custom Person List Managementscreen to further describe the List | |
| Person Filter | Optionally, select |
|---|
...
a Person Filter |
...
which has previously |
...
be created. If a filter is applied, this will reduce (filter) the number of persons displayed in the list according to the criteria specified in the filter. If a filter is not applied, it is equivalent from selecting those with any role within your organisation. | |
| Output fields | Select one or |
|---|
...
more Output fields |
...
by clicking the field name in |
...
the Available Fields |
...
list, and clicking |
...
the Add -> |
...
button. Fields can be removed by clicking the field name in |
...
the Chosen Fields |
...
list, and clicking |
...
the Remove -> |
...
button. |
...
or Move Down buttons to determine the order in which the columns will appear in the list, however, any custom fields selected will always display as the last columns of the custom list.
|
...
|
...
| |||
| Rows per page | Enter the Rows per page from 10 to 100. If more records than this figure appear in your list, they will be |
|---|
...
split into pages of this size. A small figure means more pages, but each page will load more quickly. Large page sizes may mean slow load/response times. | |
| Sorting | Select |
|---|
...
the Sorting type:
| |
| Available to | Select an Available to option: ALL means all users from your club can access the list, Logged in user |
|---|
...
| means the current user only. |
Delete a Custom Person List
- On the Customer Person List Management screen, click the Delete Link of the filter to be deleted.
- Click
...
- OK to confirm.
View a Custom Person List
- On the Customer Person List Management screen, click the View Link of the filter to be viewed. The actual list will be displayed.