Go to Mode: Website Menu: Content > News or Events
News and Events are special types of content that can be added to a SportzVault site.
They are entered in a more structured manner than general Html content, and have several advantages:
- More straightforward to edit and maintain, 'rich' (ie formatted) content can be included as well as images.
- Items are assigned a date and, optionally, an expiry date.
- Items can be shown in summary or detail format on the home page, and in the left or right bars of all pages so they are highly visible to site visitors.
- News and events are not counted in the Site Allowance.
The detail of a news or event item can be rich (i.e. formatted) Html (entered via the Html Editor), but in most cases they would be plain text. Items are restricted to less than 7500 characters (including Html markup tags) in length, which should suffice for most items.
Display of News and Events items
News and events can be configured to display in a number of ways:
- As a summary on the home page (if enabled via Site Preferences) - Current items (which have not expired) are shown for the current club/association, and in some cases the most recent 3 news items items are also shown for governing bodies (this can also be controlled via a Preference setting). Items which are up to seven days old have a 'NEW' indicator shown next to them. The first line of the news item is shown (without formatting) as well as the headline (which when clicked drills down to the News Item detail).
- Individual news and events items can also be configured to display in their entirety (including all formatting and included images) on the home page. This is done by editing the item and setting the Show full item on home page checkbox. Items will only display in this manner until manually removed, or until they expire.
- Compact summary - Current items (which have not expired) are shown for the current club/association, and in some cases the most recent three items are also shown for governing bodies. Only the headline is shown (which when clicked drills down to the Item detail). Compact summaries can be configured (via Preferences) to display in either the left or right bars of the site, and also can be configured to display on only the home page, any other page, or all pages.
- News/Events page - Accessed by clicking the News or Events main menu item. All current items are shown for the current club/association. Most of the item is shown (without formatting, extremely long items are truncated) as well as the headline (which when clicked drills down to the item detail). Expired items can be accessed acessed by clicking the News/Events Archive link.
- News/Events item page - A single item is shown in its entirety, with full formatting and any included images.
Item status filter
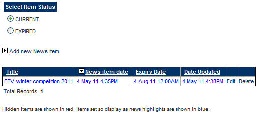
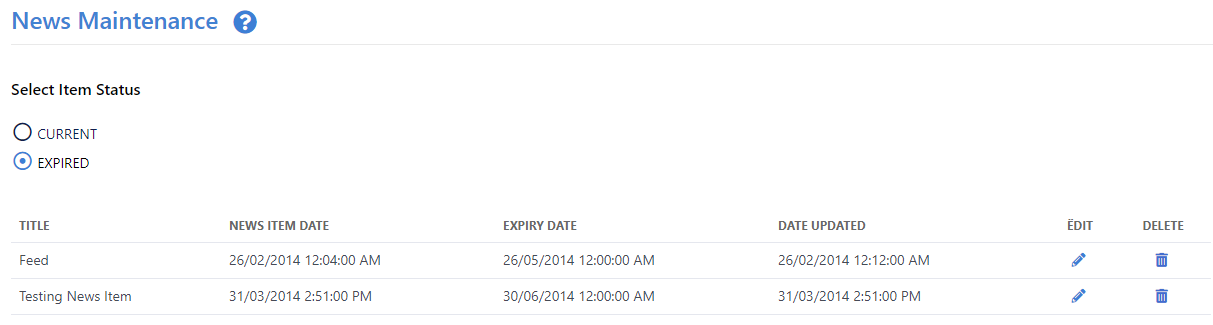
Items can be filtered by their expiry status - either CURRENT (ie i.e. expiry date has not passed, or no expiry date is specified) or EXPIRED (expiry date has passed). Select the appropriate filter from the Select Item Status options.
Creating a News Item
- Choose Content...News The News screen opens.
- Click Add New News Item In the News Maintenance screen, click Add new News item.
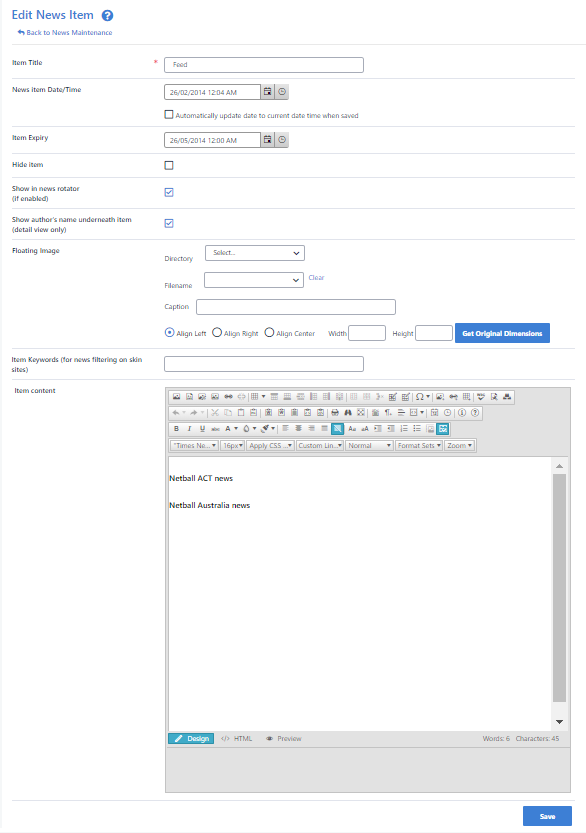
- Enter an Item Title. This will be the headline of the news item.
- The News item date/time will be set to the current date/time. This can normally be left, as it represents the date/time that should apply to the item, which is usually when it was created. If necessary edit Edit it by using the Calendar popup.
- The Item expiry date/time is automatically set to 3 months in the future. If necessary edit Edit it by using the Calendar popup. Clearing the date effectively means the item will never expire.
- Enter the detail of the item in the Item Text Html Editor. This may be formatted, and can contain any Html Elements such as images etc, however they will only appear on the News item screen (see above), and not any of the News summaries.
- Click Update to save the News item, or Back to News or Events maintenance to return to the News and Events Maintenance screen.
Creating an Event
- Choose Content...Events The Events screen opens.
- Click Add New Event. In the Events Maintenance screen, click Add new Events item.
- Enter an Item Title. This will be the headline of the event.
- The Date/time of Event will be set to tomorrow's date. Edit it by using the Calendar popup.
- The Item expiry date/time is automatically set to 3 months in the future. If necessary edit Edit it by using the Calendar popup. Clearing the date effectively means the item will never expire.
- Enter the detail of the item in the Item Text Html Editor. This may be formatted, and can contain any Html Elements such as images etc, however they will only appear on the Events item screen, and not any of the Events summaries.
- Click Update to save the Event, or Back to News or Events maintenance to return to the News and Events Maintenance screen.
Editing a News or Event Item
- Choose Content...News or Events The In the News or Events screen opens.
Click Maintenance screen, click the Edit link next to the item to be edited. - Make appropriate changes (see above).
- For News items, if you wish to automatically update the date of the item to the current time, check the Automatically update date to current date time when saved checkbox. If this is not checked, and if the date is not manually edited, then the date will remain unchanged.
- Click Update to save the item, or Back to News or Events maintenance to return to the News and Events Maintenance screen.
Deleting a News or Event Item
- Choose Content...In the News or Events The News or Events screen opensMaintenance screen, click the Delete link next to the item to be edited.
- Click the Delete link next to the item to be deleted.
- Click OK to at the confirmation message box to confirm the deletion.
Hiding a News or Event Item
An alternative to deleting an item is to hide the item. This means the item is not displayed on the public site (even as an archived item), but can still be edited (and un-hidden) later. Hidden items are shown in red in the item list.
- Choose Content...In the News or Events The News or Events screen opensMaintenance screen, click the Delete link next to the item to be edited.
- Click the Edit link next to the item to be edited.
- Check (to hide) or uncheck (to unhide) the Hide item checkbox.
- Click Update to save the item, or Back to News or Events maintenance to return to the News and Events Maintenance screen.
- Note that hidden items are shown in red.
Adding a floating image
An image (which has already by uploaded to your images directory or a subdirectory sub-directory of it via the File Manager) can be specified as a 'floating image':
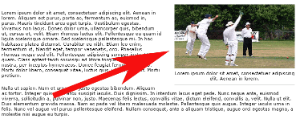

Floating images can either be located at the top right, top left or top center of the item, and the item text will wrap around. They can optionally have a caption underneath. To add a floating image:
- Select the directory of your image from the directory dropdown, then select the image from the filename dropdown.
- Optionally enter the caption - this will display underneath the image in small text.
- Select whether the image is to be aligned left or right by choosing the appropriate radio button.
- Optionally enter the width and height of the image in pixels - this will resize the image accordingly. As a guide, the width shouldn't be greater than approximately 300-400 pixels. To see the original size of the image click the Get original dimensions button.
- Optionally enter the width and height of the image in pixels - this will resize the image accordingly. As a guide, the width shouldn't be greater than approximately 300-400 pixels. To see the original size of the image click the Get original dimensions button.
To remove an existing floating image, click the clear link and the image data will be cleared.
- Optionally enter the width and height of the image in pixels - this will resize the image accordingly. As a guide, the width shouldn't be greater than approximately 300-400 pixels. To see the original size of the image click the Get original dimensions button.
| Infonote |
|---|
| NB. You will need to click the update button for the change to take effect |
Displaying the full content of a News or Event Item on the home page
...
- Choose Content...News or Events The News or Events screen opens.
- Select the Current option to display only Current Items.
- Click the Edit link next to the item to be edited.
- Check (to display) or uncheck (to not display) the Show full item on home page checkbox.
- Click Update to save the item, or Back to News or Events maintenance to return to the News and Events Maintenance screen.
- Note that items to display on the home page are shown in blue. Items will not display if hidden, or expired.
Show in news rotator (if enabled)
If this box is checked then the article will be included in the news rotator on your websites home page.
Author's name display
By default the author's name (based on the logged in user that last updated the item) is automatically displayed underneath News and Event items (not including when displayed on the home page as a 'headline'). To hide the author's name, uncheck the Show author's name underneath item checkbox.
Information for skinned sites
...
- News items which have the "Show full item on home page" option checked are designated as a news highlight
- News highlights can be displayed in an html news rotator or Adobe Flash news rotator control (please see your skinning manual)
- News item can be given a keyword which can then be used as a filter that allows you to create a "news channel" for items relevant to that keyword
...
.